

众所周知,Sentry出奇地吃内存:官方要求最低配置 16G内存+16G SWAP。实测也确实如此,16G内存可以轻松吃满,而这来自与他所依赖的大量内存杀手服务。此外,官方的安装脚本并不适配国内网络环境,安装很难进行下去。
通过将部分软件直接裸机运行,手动安装Sentry,可以全部走国内镜像站来达到最佳下载速度,虽然确实麻烦了点。它依赖的软件实在太多。最后大概跑了二十多个容器,其余服务全部都在宿主机直接启动,否则docker内保底60+容器,带来极大的内存开销。
这边使用配置 8核8G 100G硬盘,开启10G SWAP(其实安装的时候是5G,装完了再改的),顺利启动了服务。和你gpt5.6老师奋战到凌晨两点多
先上图,剩下的时间交给gpt5.6。
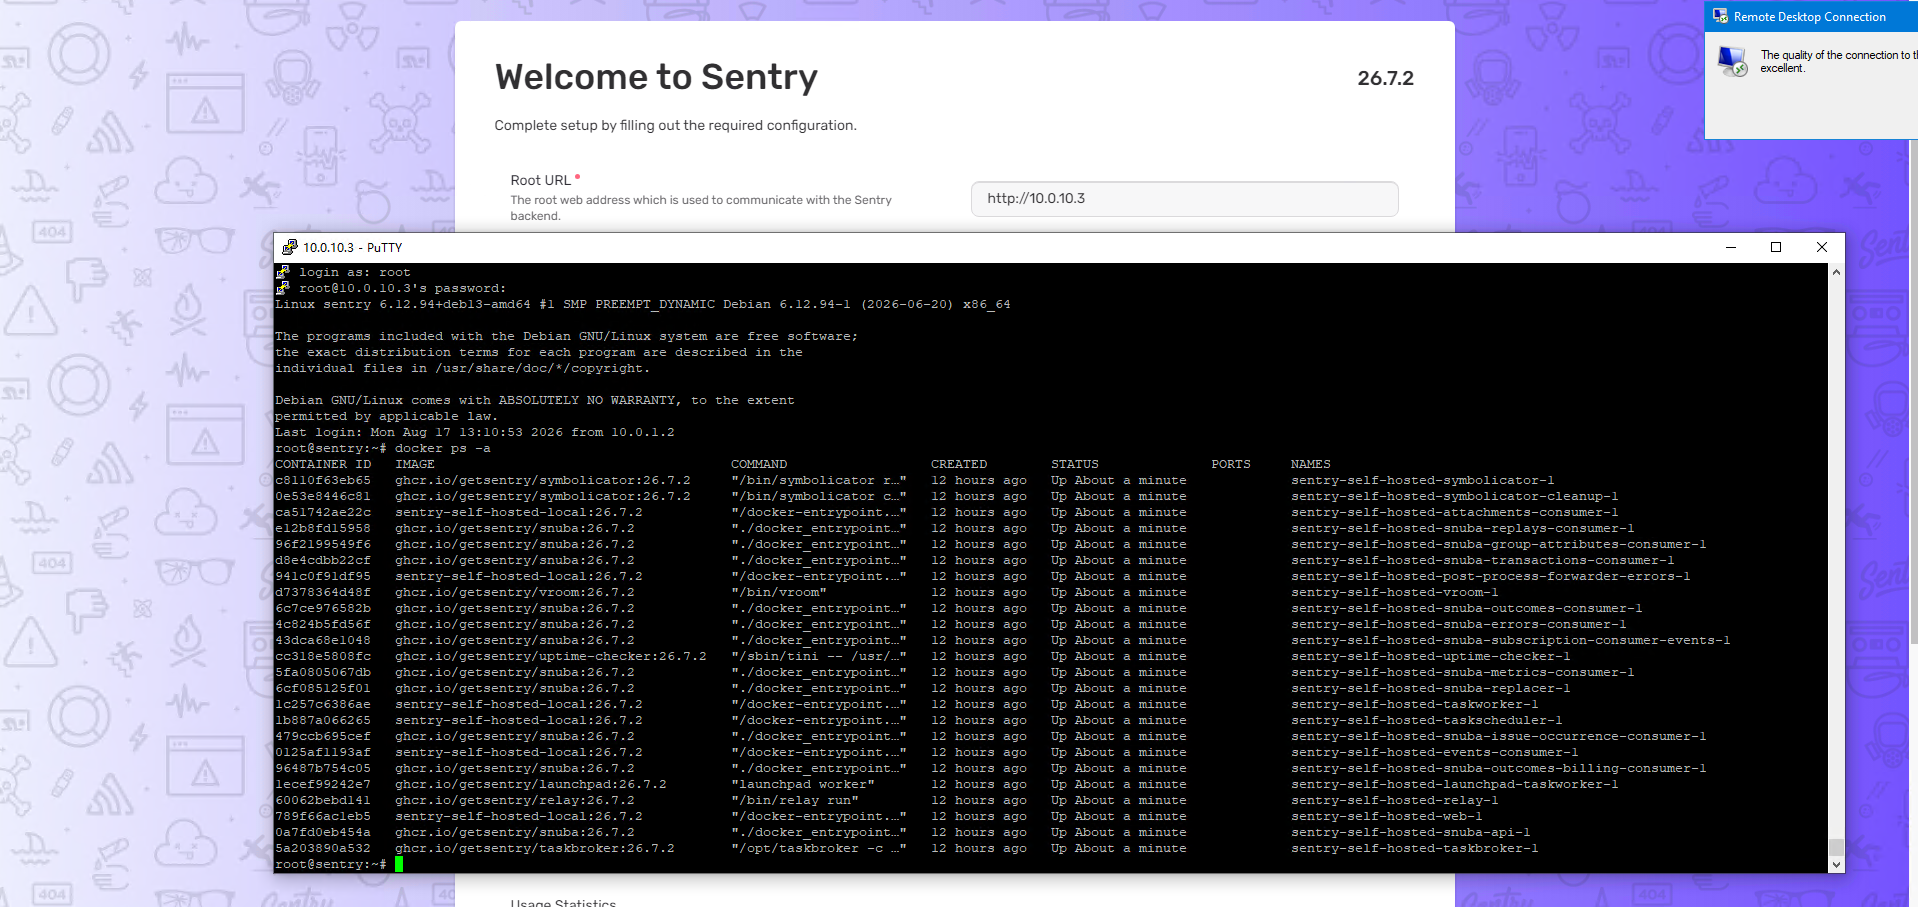
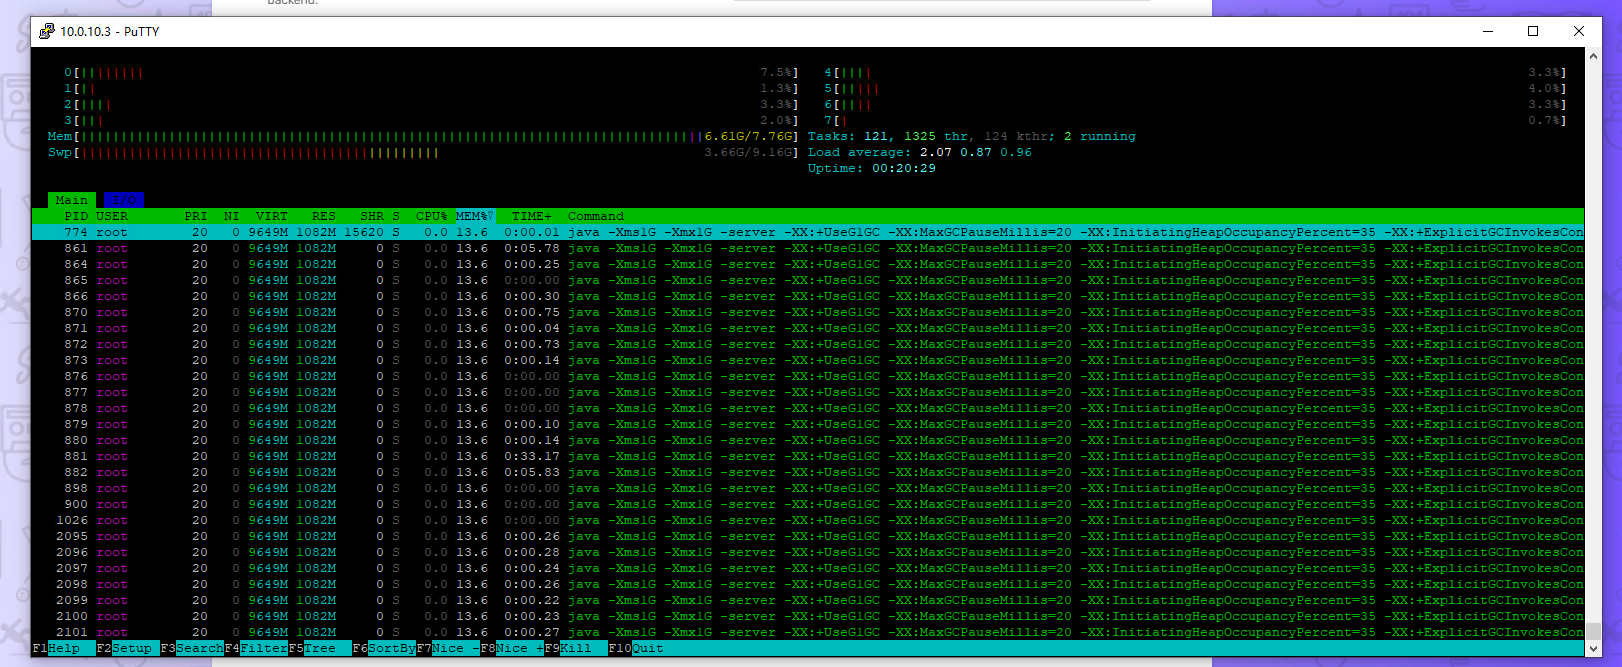
gpt5.6时间 (超长文jing'gao)
部署目标
在一台 Debian 13 单机上部署 Sentry Self-Hosted
26.7.2,启用feature-complete完整功能模式:
- PostgreSQL、PgBouncer、Redis、Memcached、Kafka、ClickHouse、SeaweedFS:宿主机原生运行
- Sentry Web、Relay、Snuba、Consumer、Symbolicator 等:Docker 运行
- Envoy:宿主机原生运行,作为唯一 HTTP 入口
- 不使用 Nginx
- 不使用 Docker PostgreSQL、Docker Redis、Docker Kafka、Docker ClickHouse
推荐资源
最低:4 核 CPU、8 GB RAM、100 GB SSD
建议:4~8 核 CPU、16 GB RAM、200 GB SSD
Sentry
feature-complete包含 Kafka、ClickHouse、Snuba 和多个 Consumer;2 核 4GB 的机器通常不适合完整模式。
一、最终架构与端口
架构如下:
                           ┌──────────────────┐
                           │ 浏览器 / SDK / CDN │
                           └────────┬─────────┘
                                    │ HTTP :80
                         ┌──────────▼──────────┐
                         │ Envoy(宿主机原生) │
                         └─────────┬───────────┘
                                   │
             ┌─────────────────────┴─────────────────────┐
             │                                           │
 ┌───────────▼────────────┐                 ┌────────────▼──────────┐
 │ Sentry Web :9001       │                 │ Relay :3000           │
 │ Docker / host network  │                 │ Docker / host network │
 └───────────┬────────────┘                 └────────────┬──────────┘
             │                                           │
             └───────────────────┬───────────────────────┘
                                 │ 127.0.0.1
 ┌───────────────────────────────┼─────────────────────────────────────┐
 │ PostgreSQL / PgBouncer / Redis / Memcached / Kafka / ClickHouse     │
 │ SeaweedFS                                                              │
 │                              宿主机原生运行                            │
 └─────────────────────────────────────────────────────────────────────┘
本方案所有 Docker 应用服务使用:
network_mode: host因此容器内访问宿主机服务时用:
127.0.0.1端口表
| 服务 | 监听端口 | 用途 | 是否公开 |
|---|---|---|---|
| Envoy | 80 | 浏览器、SDK、CDN 入口 | 是 |
| Envoy Admin | 9901 | Envoy 状态接口 | 仅本机 |
| Sentry Web | 9001 | Sentry 管理后台上游 | 仅内部 |
| Relay | 3000 | 事件接收上游 | 仅内部 |
| Snuba API | 1218 | Snuba 查询 API | 仅内部 |
| Symbolicator | 3021 | 符号和 Source Map 解析 | 仅内部 |
| PostgreSQL | 5432 | 数据库 | 仅本机 |
| PgBouncer | 6432 | PostgreSQL 连接池 | 仅本机 |
| Redis | 6379 | 缓存、Session、队列 | 仅本机 |
| Memcached | 11211 | 缓存 | 仅本机 |
| Kafka | 9092 | 消息队列 | 仅本机 |
| ClickHouse TCP | 9000 | Snuba 数据存储 | 仅本机 |
| ClickHouse HTTP | 8123 | ClickHouse HTTP API | 仅本机 |
| SeaweedFS S3 | 8333 | S3 兼容对象存储 | 仅本机 |
为什么 Sentry Web 采用 9001?
ClickHouse Native TCP 默认使用 9000
Sentry Web 默认也使用 9000
Docker Host Network 下两者会端口冲突
所以:
ClickHouse:9000
Sentry Web:9001
最终访问入口始终是:
http://服务器IP/例如:
http://10.0.10.3/而不是:
http://10.0.10.3:9001/二、系统基础准备
以下命令以 root 身份执行。
更新系统:
apt update
apt upgrade -y
安装常用工具、AWS CLI、数据库客户端:
apt install -y \
  ca-certificates \
  curl \
  wget \
  gnupg \
  lsb-release \
  unzip \
  jq \
  vim \
  git \
  awscli \
  memcached \
  redis-server \
  pgbouncer \
  postgresql \
  postgresql-client
检查系统资源:
free -h
df -h
nproc
设置时区,例如中国大陆:
timedatectl set-timezone Asia/Shanghai
timedatectl status
为 Kafka、ClickHouse 等高文件句柄服务设置限制:
cat >/etc/security/limits.d/99-sentry.conf <<'EOF'
* soft nofile 262144
* hard nofile 262144
EOF
三、安装 Docker Engine 与 Compose Plugin
如果系统中已经安装 Docker,可跳过本节。
清理 Debian 自带旧包:
apt remove -y \
  docker.io \
  docker-doc \
  docker-compose \
  podman-docker \
  containerd \
  runc 2>/dev/null || true
添加 Docker 官方仓库密钥:
install -m 0755 -d /etc/apt/keyrings

curl -fsSL https://download.docker.com/linux/debian/gpg \
  -o /etc/apt/keyrings/docker.asc

chmod a+r /etc/apt/keyrings/docker.asc
添加仓库:
cat >/etc/apt/sources.list.d/docker.sources <<EOF
Types: deb
URIs: https://download.docker.com/linux/debian
Suites: $(. /etc/os-release && echo "$VERSION_CODENAME")
Components: stable
Signed-By: /etc/apt/keyrings/docker.asc
EOF
安装:
apt update

apt install -y \
  docker-ce \
  docker-ce-cli \
  containerd.io \
  docker-buildx-plugin \
  docker-compose-plugin
启动并验证:
systemctl enable --now docker

docker version
docker compose version
四、配置 PostgreSQL 和 PgBouncer
Sentry 使用 PostgreSQL 保存用户、组织、项目、事件元数据和系统配置。
PgBouncer 用来管理连接池。Sentry 连接 PgBouncer,而不是直接连接 PostgreSQL。
PostgreSQL:127.0.0.1:5432
PgBouncer:127.0.0.1:6432
Sentry:连接 127.0.0.1:6432
4.1 启动 PostgreSQL
查看集群:
pg_lsclusters期望看到类似:
Ver Cluster Port Status Owner    Data directory
17  main    5432 online postgres /var/lib/postgresql/17/main
若未启动:
systemctl enable --now postgresql
systemctl start postgresql
pg_lsclusters
测试 PostgreSQL:
sudo -u postgres \
  psql \
  -p 5432 \
  -d postgres \
  -c 'SELECT version();'
4.2 创建数据库与账号
进入 PostgreSQL:
sudo -u postgres psql执行:
CREATE USER sentry WITH PASSWORD '替换为强数据库密码';

CREATE DATABASE sentry
  OWNER sentry
  ENCODING 'UTF8'
  TEMPLATE template0;
退出:
\q测试 sentry 用户直连:
PGPASSWORD='替换为强数据库密码' \
psql \
  -h 127.0.0.1 \
  -p 5432 \
  -U sentry \
  -d sentry \
  -c 'SELECT current_database(), current_user;'
预期:
 current_database | current_user
------------------+-------------
 sentry           | sentry
4.3 配置 PgBouncer
编辑配置:
vim /etc/pgbouncer/pgbouncer.ini可使用以下单机本机连接配置:
[databases]
sentry = host=127.0.0.1 port=5432 dbname=sentry

[pgbouncer]
listen_addr = 127.0.0.1
listen_port = 6432

auth_type = trust

pool_mode = transaction

max_client_conn = 10000
default_pool_size = 50
min_pool_size = 5
reserve_pool_size = 10

server_reset_query = DISCARD ALL

admin_users = postgres,sentry
stats_users = postgres,sentry

ignore_startup_parameters = extra_float_digits,options

log_connections = 1
log_disconnections = 1
log_pooler_errors = 1
启动:
systemctl enable --now pgbouncer
systemctl restart pgbouncer
检查端口:
ss -lntp | grep ':6432'验证 Sentry 通过 PgBouncer 访问数据库:
PGPASSWORD='替换为强数据库密码' \
psql \
  -h 127.0.0.1 \
  -p 6432 \
  -U sentry \
  -d sentry \
-c 'SELECT current_database(), current_user;'此处auth_type = trust只适用于 PgBouncer 严格绑定127.0.0.1的本机单机部署。不要把6432暴露给公网。
五、Redis 与 Memcached
5.1 Redis
编辑配置:
vim /etc/redis/redis.conf确认:
bind 127.0.0.1 -::1
protected-mode yes

appendonly yes

maxmemory 0
maxmemory-policy volatile-lru
启动:
systemctl enable --now redis-server
systemctl restart redis-server
验证:
redis-cli ping预期:
PONG5.2 Memcached
编辑:
vim /etc/memcached.conf确认绑定本地:
-l 127.0.0.1
-p 11211
启动:
systemctl enable --now memcached
systemctl restart memcached
验证:
ss -lntp | grep ':11211'六、部署 Kafka 单节点 KRaft
Sentry 26.7.2 官方 Docker Compose 使用 Kafka:
confluentinc/cp-kafka:7.6.6无 Docker 的 Kafka 安装方式依赖你选择的发行包;但关键配置必须保证:
- 单节点 KRaft;
- Kafka 监听
127.0.0.1:9092; - 单节点副本系数为
1; - 单机环境可临时开启自动建 Topic。
关键配置文件假定为:
/etc/kafka/server.properties核心配置如下:
process.roles=broker,controller
node.id=1

controller.quorum.voters=1@127.0.0.1:9093
controller.listener.names=CONTROLLER

listeners=PLAINTEXT://127.0.0.1:9092,CONTROLLER://127.0.0.1:9093
advertised.listeners=PLAINTEXT://127.0.0.1:9092

listener.security.protocol.map=CONTROLLER:PLAINTEXT,PLAINTEXT:PLAINTEXT
inter.broker.listener.name=PLAINTEXT

log.dirs=/var/lib/kafka

num.partitions=1
offsets.topic.replication.factor=1
transaction.state.log.replication.factor=1
transaction.state.log.min.isr=1

log.retention.hours=24

message.max.bytes=50000000
replica.fetch.max.bytes=50000000

auto.create.topics.enable=true
创建目录和服务用户:
useradd \
  --system \
  --home /var/lib/kafka \
  --shell /usr/sbin/nologin \
  kafka || true

mkdir -p /var/lib/kafka /var/log/kafka

chown -R kafka:kafka /var/lib/kafka /var/log/kafka
生成 KRaft Cluster ID:
kafka-storage.sh random-uuid格式化数据目录:
kafka-storage.sh format \
  -t '替换为上一步生成的ClusterID' \
  -c /etc/kafka/server.properties
启动:
systemctl enable --now kafka
systemctl restart kafka
验证:
ss -lntp | grep ':9092'

kafka-topics.sh \
  --bootstrap-server 127.0.0.1:9092 \
  --list
初始化阶段,Sentry 可能报:
Timeout when waiting for Kafka topic 'ingest-occurrences'
KafkaError UNKNOWN_TOPIC_OR_PART
对单机初次部署,
auto.create.topics.enable=true可以帮助初始化。长期生产运行建议显式创建 Topic,并管理分区、保留时间和磁盘容量。
七、部署 ClickHouse
ClickHouse 是 Snuba 的底层事件分析数据库。
Sentry 26.7.2 官方 Compose 使用的基线是:
altinity/clickhouse-server:25.3.6.10034.altinitystable建议优先使用和该版本接近、经过验证的 ClickHouse 版本。使用更高版本可能遇到 Snuba Migration 兼容问题。
- 这里AI没写,上下文压缩过没了,我是自己搜教程安装的当前最新版本。
启动后验证:
systemctl enable --now clickhouse-server
systemctl restart clickhouse-server

clickhouse-client --query 'SELECT version();'
clickhouse-client --query 'SELECT 1;'
确认端口:
ss -lntp | grep -E ':(8123|9000)\b'7.1 Snuba Migration 兼容处理
如果 Snuba 初始化中看到:
Column(s) retention_days ...
AggregatingMergeTree ...
allow_dimensions_outside_sorting_key
创建兼容配置:
cat >/etc/clickhouse-server/config.d/sentry-snuba-compat.xml <<'EOF'
<clickhouse>
  <merge_tree>
    <allow_dimensions_outside_sorting_key>1</allow_dimensions_outside_sorting_key>
  </merge_tree>
</clickhouse>
EOF
重启:
systemctl restart clickhouse-server验证:
clickhouse-client --query 'SELECT 1;'不要把该项写在错误层级,否则会看到:
UNKNOWN_SETTING allow_dimensions_outside_sorting_key八、部署 SeaweedFS,并用 AWS CLI 创建 Bucket
SeaweedFS 提供 S3 Compatible API,可用于 Sentry Profiles 等对象存储。
8.1 下载 SeaweedFS
以实际版本下载 URL 为准。下载完成后放到:
/usr/local/bin/weed并设置权限:
chmod 755 /usr/local/bin/weed

weed version
8.2 创建目录与服务用户
useradd \
  --system \
  --home /var/lib/seaweedfs \
  --shell /usr/sbin/nologin \
  seaweedfs || true

mkdir -p /var/lib/seaweedfs
mkdir -p /etc/seaweedfs

chown -R seaweedfs:seaweedfs /var/lib/seaweedfs
chmod 750 /var/lib/seaweedfs
8.3 创建 S3 用户凭据
生成 Secret:
openssl rand -base64 36创建 SeaweedFS S3 身份文件:
vim /etc/seaweedfs/s3.json示例:
{
  "identities": [
    {
      "name": "sentry",
      "credentials": [
        {
          "accessKey": "sentry",
          "secretKey": "替换为生成的随机Secret"
        }
      ],
      "actions": [
        "Admin",
        "Read",
        "Write",
        "List",
        "Tagging"
      ]
    }
  ]
}
保护配置:
chown root:seaweedfs /etc/seaweedfs/s3.json
chmod 640 /etc/seaweedfs/s3.json
8.4 创建 systemd 服务
创建:
vim /etc/systemd/system/seaweedfs.service内容:
[Unit]
Description=SeaweedFS for Sentry
After=network-online.target
Wants=network-online.target

[Service]
Type=simple
User=seaweedfs
Group=seaweedfs

Environment=AWS_ACCESS_KEY_ID=sentry
Environment=AWS_SECRET_ACCESS_KEY=替换为与s3.json一致的Secret

ExecStart=/usr/local/bin/weed mini \
  -dir=/var/lib/seaweedfs \
  -filer.defaultReplicaPlacement=000 \
  -metricsPort=9091 \
  -volume.dir.idx=/var/lib/seaweedfs/idx \
  -volume.index=leveldbLarge \
  -volume.preStopSeconds=8 \
  -volume.readMode=redirect \
  -ip.bind=127.0.0.1 \
  -webdav=false

Restart=always
RestartSec=5

[Install]
WantedBy=multi-user.target
启动:
systemctl daemon-reload
systemctl enable --now seaweedfs
systemctl status seaweedfs --no-pager -l
验证:
curl -fsS http://127.0.0.1:8333/healthz
ss -lntp | grep ':8333'
8.5 使用 AWS CLI 创建 Sentry Bucket
安装 awscli 后,临时写入 S3 凭据:
export AWS_ACCESS_KEY_ID='sentry'
export AWS_SECRET_ACCESS_KEY='替换为SeaweedFS Secret'
export AWS_DEFAULT_REGION='us-east-1'
测试 SeaweedFS S3 API:
aws \
  --endpoint-url http://127.0.0.1:8333 \
  s3 ls
创建 Sentry Profile Bucket:
aws \
  --endpoint-url http://127.0.0.1:8333 \
  s3 mb s3://profiles
确认创建成功:
aws \
  --endpoint-url http://127.0.0.1:8333 \
  s3 ls
应该可看到:
profiles也可以用 s3api 验证:
aws \
  --endpoint-url http://127.0.0.1:8333 \
  s3api list-buckets
测试写入与读取:
echo 'sentry seaweedfs test' >/tmp/sentry-s3-test.txt

aws \
  --endpoint-url http://127.0.0.1:8333 \
  s3 cp \
  /tmp/sentry-s3-test.txt \
  s3://profiles/sentry-s3-test.txt

aws \
  --endpoint-url http://127.0.0.1:8333 \
  s3 ls \
  s3://profiles/

aws \
  --endpoint-url http://127.0.0.1:8333 \
  s3 cp \
  s3://profiles/sentry-s3-test.txt \
  /tmp/sentry-s3-test-downloaded.txt

cat /tmp/sentry-s3-test-downloaded.txt
完成后清理 Shell 环境变量:
unset AWS_ACCESS_KEY_ID
unset AWS_SECRET_ACCESS_KEY
unset AWS_DEFAULT_REGION
九、下载并准备 Sentry 26.7.2
mkdir -p /opt
cd /opt

wget \
  https://github.com/getsentry/self-hosted/archive/refs/tags/26.7.2.tar.gz

tar -xzf 26.7.2.tar.gz

cd /opt/self-hosted-26.7.2
设置完整功能模式:
vim .env确认:
COMPOSE_PROFILES=feature-complete十、创建 Sentry 配置
创建目录:
mkdir -p \
  /etc/sentry \
  /etc/sentry/relay \
  /etc/sentry/symbolicator
复制官方基础配置:
cp /opt/self-hosted-26.7.2/sentry/config.example.yml \
  /etc/sentry/config.yml

cp /opt/self-hosted-26.7.2/sentry/sentry.conf.example.py \
  /etc/sentry/sentry.conf.py
10.1 配置数据库和 Web 端口
编辑:
vim /etc/sentry/sentry.conf.py数据库配置应为:
DATABASES = {
    "default": {
        "ENGINE": "sentry.db.postgres",
        "NAME": "sentry",
        "USER": "sentry",
        "PASSWORD": "替换为数据库密码",
        "HOST": "127.0.0.1",
        "PORT": "6432",
    }
}
配置 Web:
SENTRY_WEB_HOST = "0.0.0.0"
SENTRY_WEB_PORT = 9001
10.2 配置内部和外部 URL、S3 Profile 存储
编辑:
vim /etc/sentry/config.yml加入:
system.internal-url-prefix: 'http://127.0.0.1:9001'
system.url-prefix: 'http://10.0.10.3'
SeaweedFS S3 配置:
filestore.profiles-backend: 's3'

filestore.profiles-options:
  bucket_acl: "private"
  default_acl: "private"

  access_key: "sentry"
  secret_key: "替换为SeaweedFS实际Secret"

  bucket_name: "profiles"
  region_name: "us-east-1"

  endpoint_url: "http://127.0.0.1:8333"
  addressing_style: "path"
  signature_version: "s3v4"
Symbolicator:
symbolicator.enabled: true

symbolicator.options:
  url: "http://127.0.0.1:3021"
10.3 创建运行环境文件
生成两个随机密钥:
openssl rand -base64 48
openssl rand -base64 48
创建:
vim /etc/sentry/sentry.env内容:
SENTRY_CONF=/etc/sentry

COMPOSE_PROFILES=feature-complete

SENTRY_EVENT_RETENTION_DAYS=90

SENTRY_KAFKA_MAX_POLL_INTERVAL_MS=300000

SNUBA=http://127.0.0.1:1218

SENTRY_SYSTEM_SECRET_KEY=替换为第一个随机密钥

LAUNCHPAD_RPC_SHARED_SECRET=替换为第二个随机密钥
十一、Relay 和 Symbolicator 配置
Relay:
vim /etc/sentry/relay/config.ymlrelay:
upstream: "http://127.0.0.1:9001/"
host: 127.0.0.1
port: 3000
processing:
enabled: true
kafka_config:
- {name: "bootstrap.servers", value: "127.0.0.1:9092"}
redis: redis://127.0.0.1:6379Symbolicator:
vim /etc/sentry/symbolicator/config.ymlcache_dir: "/data"
bind: "127.0.0.1:3021"
logging:
level: "warn"
sentry_dsn: null配置保护:
chown -R root:root /etc/sentry

find /etc/sentry -type d -exec chmod 755 {} \;
find /etc/sentry -type f -exec chmod 644 {} \;

chmod 600 \
  /etc/sentry/sentry.env \
  /etc/sentry/sentry.conf.py \
  /etc/sentry/config.yml \
  /etc/sentry/relay/config.yml \
  /etc/sentry/symbolicator/config.yml
十二、创建“应用层专用”Docker Compose
原始官方 docker-compose.yml 同时定义了:
PostgreSQL
Redis
Kafka
ClickHouse
SeaweedFS
Memcached
Sentry
Snuba
Relay
...
本方案不能直接用它 up -d,否则会重新启动一套 Docker 基础设施。
需要创建:
/opt/self-hosted-26.7.2/docker-compose.app.yml原则如下:
不保留基础服务:
postgres pgbouncer redis memcached kafka clickhouse seaweedfs nginx保留应用服务:
web
relay
symbolicator
symbolicator-cleanup
snuba-api

events-consumer
attachments-consumer
post-process-forwarder-errors

snuba-errors-consumer
snuba-outcomes-consumer
snuba-outcomes-billing-consumer
snuba-transactions-consumer
snuba-replays-consumer
snuba-metrics-consumer
snuba-group-attributes-consumer
snuba-issue-occurrence-consumer
snuba-subscription-consumer-events
snuba-replacer

taskbroker
taskworker
taskscheduler
vroom
launchpad-taskworker
uptime-checker
所有保留服务增加:
network_mode: host- 删除
depends_on中对 Docker 基础服务的依赖; 把原先 Docker DNS 服务名改为宿主机地址:
postgres → 127.0.0.1 pgbouncer → 127.0.0.1 redis → 127.0.0.1 kafka → 127.0.0.1 clickhouse → 127.0.0.1 seaweedfs → 127.0.0.1 symbolicator → 127.0.0.1 snuba-api → 127.0.0.1 vroom → 127.0.0.1- 用
/etc/sentry覆盖官方容器配置目录。
例如,Sentry 默认环境中的:
SNUBA: "http://snuba-api:1218"
VROOM: "http://vroom:8085"
改为:
SNUBA: "http://127.0.0.1:1218"
VROOM: "http://127.0.0.1:8085"
Snuba 默认环境中的:
CLICKHOUSE_HOST: clickhouse
DEFAULT_BROKERS: "kafka:9092"
REDIS_HOST: redis
改为:
CLICKHOUSE_HOST: 127.0.0.1
DEFAULT_BROKERS: "127.0.0.1:9092"
REDIS_HOST: 127.0.0.1
12.1 Compose 核心示例
下面不是全部 Consumer 定义,但展示关键改动方式:
services:
  web:
    image: sentry-self-hosted-local:26.7.2
    build:
      context: ./sentry
      args:
        - SENTRY_IMAGE
    network_mode: host
    restart: unless-stopped
    env_file:
      - /etc/sentry/sentry.env
    environment:
      SENTRY_CONF: /etc/sentry
      SNUBA: http://127.0.0.1:1218
      VROOM: http://127.0.0.1:8085
    volumes:
      - sentry-data:/data
      - /etc/sentry:/etc/sentry:ro
      - ./geoip:/geoip:ro
      - ./certificates:/usr/local/share/ca-certificates:ro
    entrypoint: /etc/sentry/entrypoint.sh
    command: ["run", "web"]

  relay:
    image: ghcr.io/getsentry/relay:26.7.2
    network_mode: host
    restart: unless-stopped
    env_file:
      - /etc/sentry/sentry.env
    volumes:
      - /etc/sentry/relay:/work/.relay
    command: ["run"]

  snuba-api:
    image: ghcr.io/getsentry/snuba:26.7.2
    network_mode: host
    restart: unless-stopped
    environment:
      SNUBA_SETTINGS: self_hosted
      CLICKHOUSE_HOST: 127.0.0.1
      DEFAULT_BROKERS: 127.0.0.1:9092
      REDIS_HOST: 127.0.0.1
      UWSGI_MAX_REQUESTS: "10000"
      UWSGI_DISABLE_LOGGING: "true"
    command: api --host 0.0.0.0 --port 1218

  symbolicator:
    image: ghcr.io/getsentry/symbolicator:26.7.2
    network_mode: host
    restart: unless-stopped
    volumes:
      - symbolicator-data:/data
      - /etc/sentry/symbolicator:/etc/symbolicator:ro
    command: run -c /etc/symbolicator/config.yml

volumes:
  sentry-data:
symbolicator-data:创建完整docker-compose.app.yml时,应以当前版本官方docker-compose.yml中各服务的command、环境变量和挂载为准,保留完整功能所需 Consumer;不要自己猜测 Consumer 命令。
构建本地 Sentry 镜像:
cd /opt/self-hosted-26.7.2

docker compose \
  -f docker-compose.app.yml \
  build web
启动:
docker compose \
  -f docker-compose.app.yml \
  up -d
查看状态:
docker ps --format 'table {{.Names}}\t{{.Status}}'十三、初始化 Sentry
基础服务正常后,执行:
cd /opt/self-hosted-26.7.2

docker compose \
  -f docker-compose.app.yml \
  run --rm web upgrade --create-kafka-topics
初始化会执行:
PostgreSQL Migration
Snuba / ClickHouse Migration
Kafka Topic 创建
管理员账号创建
Sentry 初始化配置
完成后:
docker compose \
  -f docker-compose.app.yml \
  up -d
十四、使用 Envoy 反向代理
Envoy 是唯一公网入口。
路由规则:
/api/store/                 → Relay :3000
/api/<数字项目ID>/...        → Relay :3000
/api/0/relays/              → Relay :3000
/_assets/...                → Sentry Web :9001,改写静态资源路径
其他所有请求               → Sentry Web :9001
创建目录:
mkdir -p /etc/envoy /var/log/envoy创建配置:
vim /etc/envoy/envoy.yaml内容:
static_resources:
  listeners:
    - name: sentry_http
      address:
        socket_address:
          address: 0.0.0.0
          port_value: 80

      filter_chains:
        - filters:
            - name: envoy.filters.network.http_connection_manager
              typed_config:
                "@type": type.googleapis.com/envoy.extensions.filters.network.http_connection_manager.v3.HttpConnectionManager

                stat_prefix: sentry_http

                use_remote_address: true
                xff_num_trusted_hops: 0

                route_config:
                  name: sentry_routes

                  virtual_hosts:
                    - name: sentry
                      domains:
                        - "*"

                      routes:
                        - match:
                            prefix: "/api/store/"
                          route:
                            cluster: relay
                            timeout: 90s

                        - match:
                            safe_regex:
                              google_re2: {}
                              regex: "^/api/[0-9]+/.*"
                          route:
                            cluster: relay
                            timeout: 90s

                        - match:
                            prefix: "/api/0/relays/"
                          route:
                            cluster: relay
                            timeout: 90s

                        - match:
                            prefix: "/_assets/"
                          route:
                            cluster: sentry_web
                            prefix_rewrite: "/_static/dist/sentry/"
                            timeout: 90s

                        - match:
                            prefix: "/"
                          route:
                            cluster: sentry_web
                            timeout: 90s

                http_filters:
                  - name: envoy.filters.http.router
                    typed_config:
                      "@type": type.googleapis.com/envoy.extensions.filters.http.router.v3.Router

  clusters:
    - name: sentry_web
      type: STATIC
      connect_timeout: 5s
      lb_policy: ROUND_ROBIN

      load_assignment:
        cluster_name: sentry_web
        endpoints:
          - lb_endpoints:
              - endpoint:
                  address:
                    socket_address:
                      address: 127.0.0.1
                      port_value: 9001

    - name: relay
      type: STATIC
      connect_timeout: 5s
      lb_policy: ROUND_ROBIN

      load_assignment:
        cluster_name: relay
        endpoints:
          - lb_endpoints:
              - endpoint:
                  address:
                    socket_address:
                      address: 127.0.0.1
                      port_value: 3000

admin:
  access_log_path: /var/log/envoy/admin_access.log

  address:
    socket_address:
      address: 127.0.0.1
      port_value: 9901
创建 systemd 服务:
vim /etc/systemd/system/envoy.service[Unit]
Description=Envoy Proxy for Sentry
After=network-online.target
Wants=network-online.target
[Service]
Type=simple
ExecStart=/usr/local/bin/envoy -c /etc/envoy/envoy.yaml
Restart=on-failure
RestartSec=5
[Install]
WantedBy=multi-user.target验证 Envoy 配置:
/usr/local/bin/envoy \
  -c /etc/envoy/envoy.yaml \
  --mode validate
启动:
systemctl daemon-reload
systemctl enable --now envoy

systemctl status envoy --no-pager -l
检查监听:
ss -lntp | grep -E ':(80|9901)\b'十五、上线前逐层验证
不要只看 Docker 是否显示 Up。必须逐层检查。
15.1 PostgreSQL
pg_lsclusters期望:
17 main 5432 onlinesudo -u postgres \
psql \
-p 5432 \
-d postgres \
-c 'SELECT 1;'15.2 PgBouncer
PGPASSWORD='数据库密码' \
psql \
  -h 127.0.0.1 \
  -p 6432 \
  -U sentry \
  -d sentry \
  -c 'SELECT 1;'
15.3 Redis
redis-cli ping必须返回:
PONG15.4 ClickHouse
clickhouse-client --query 'SELECT 1;'15.5 SeaweedFS 和 Bucket
curl -fsS http://127.0.0.1:8333/healthzexport AWS_ACCESS_KEY_ID='sentry'
export AWS_SECRET_ACCESS_KEY='SeaweedFS Secret'
export AWS_DEFAULT_REGION='us-east-1'
aws \
--endpoint-url http://127.0.0.1:8333 \
s3 ls应看到:
profiles15.6 Sentry Web
健康检查:
curl -v --max-time 10 \
  http://127.0.0.1:9001/_health/
预期:
HTTP/1.1 200 OK

ok
首页:
curl -v --max-time 15 \
  http://127.0.0.1:9001/
预期:
HTTP/1.1 302 Found
location: /auth/login/
15.7 Envoy
curl -v --max-time 10 \
  http://127.0.0.1/_health/
预期:
HTTP/1.1 200 OK
server: envoy

ok
测试首页:
curl -v --max-time 15 \
  http://127.0.0.1/
预期:
HTTP/1.1 302 Found
location: /auth/login/
server: envoy
查看上游状态:
curl -fsS http://127.0.0.1:9901/clusters \
  | grep -E -A8 -B2 'sentry_web|relay'
重点确认:
health_flags::healthy十六、复盘:这次部署中最值得记录的坑
16.1 /_health/ 返回 200,不代表 Sentry 页面能用
这是最容易误判的地方。
健康检查:
curl http://127.0.0.1/_health/可能返回:
ok但首页仍然一直转圈,Envoy 最终显示:
upstream request timeout日志中出现:
connection to server at "127.0.0.1", port 6432 failed:
FATAL: client_login_timeout (server down)
说明:
Envoy 正常
Sentry Web 存活
/_health/ 正常
PostgreSQL / PgBouncer 链路异常
原因:
/_health/ 不需要访问数据库
/          需要数据库、Session、认证和组织信息
所以真正的检查顺序应是:
pg_lsclusters

PGPASSWORD='数据库密码' \
psql -h 127.0.0.1 -p 6432 -U sentry -d sentry -c 'SELECT 1;'

curl -v --max-time 15 http://127.0.0.1:9001/

curl -v --max-time 15 http://127.0.0.1/
16.2 Sentry Web 和 ClickHouse 都不能用 9000
如果 Sentry Web 仍配置为:
9000而 ClickHouse 已经占用:
9000浏览器可能看到 ClickHouse 相关响应,而不是 Sentry。
正确规划:
ClickHouse:9000
Sentry Web:9001
Envoy:80
16.3 访问 :9001 不是正确的用户访问方式
用户只能访问:
http://服务器IP/即 Envoy 80。
9001 是 Sentry Web 的内部上游端口。即使它可访问,也不应作为最终入口、SDK 地址或 CDN 回源地址。
16.4 Kafka Topic 初始化超时
典型报错:
Timeout when waiting for Kafka topic 'ingest-occurrences'
KafkaError UNKNOWN_TOPIC_OR_PART
检查:
systemctl status kafka --no-pager -l

kafka-topics.sh \
  --bootstrap-server 127.0.0.1:9092 \
  --list
新部署中可临时启用:
auto.create.topics.enable=true随后重新执行:
docker compose \
  -f docker-compose.app.yml \
  run --rm web upgrade --create-kafka-topics
16.5 ClickHouse 版本与 Snuba Migration
使用更高版本 ClickHouse 时,Snuba 可能出现:
allow_dimensions_outside_sorting_key可通过前文 <merge_tree> 配置暂时兼容,但长期更推荐使用接近官方 26.7.2 支持范围的 ClickHouse 版本。
16.6 Redis 不正常会连锁影响 Web
Sentry Web 可能报:
Error 111 connecting to 127.0.0.1:6379. Connection refused此时先执行:
redis-cli ping没有得到:
PONG之前,不必继续怀疑 Envoy 或浏览器。
16.7 Symbolicator 未定义 StatsD 环境变量
典型错误:
metrics: got variable `${SYMBOLICATOR_STATSD_ADDR}`, but it does not exist没有配置 StatsD 时,删除 Metrics 相关配置,使用最小 Symbolicator 配置即可。
十七、域名、CDN、HTTPS 与防火墙
先在内网确认:
http://10.0.10.3/正常后再接入域名。
建议顺序:
1. 添加 DNS A 记录;
2. 先保持 DNS-only;
3. 验证 http://sentry.example.com/;
4. 修改 Sentry 的公开 URL;
5. 配置 HTTPS;
6. 最后启用 CDN。
修改 /etc/sentry/config.yml:
system.url-prefix: 'https://sentry.example.com'
system.internal-url-prefix: 'http://127.0.0.1:9001'
应用配置:
cd /opt/self-hosted-26.7.2

docker compose \
  -f docker-compose.app.yml \
  restart web relay
公网只应放行:
80/tcp
443/tcp(启用 HTTPS 后)
应保持内部访问或用防火墙限制的端口:
3000
5432
6432
6379
8123
9000
9092
9901
11211
1218
3021
8333
CDN 回源应连接 Envoy:
http://源站:80不要回源到:
:9001
:3000
:5432
:6432
:6379
:9092
:9000
:8123
十八、备份重点
至少纳入备份:
PostgreSQL 数据库
ClickHouse 数据目录
Kafka 数据目录与 Topic 配置
SeaweedFS 数据目录
/etc/sentry/
/etc/envoy/
/etc/postgresql/
/etc/pgbouncer/
/etc/kafka/
/etc/clickhouse-server/
/etc/seaweedfs/
PostgreSQL 逻辑备份示例:
mkdir -p /backup

sudo -u postgres \
  pg_dump \
  -Fc \
  sentry \
  > /backup/sentry-$(date +%F).dump
总结
这套架构的核心不是“完全不用 Docker”,而是:
PostgreSQL、Kafka、ClickHouse、Redis、SeaweedFS
    → 运行在宿主机

Sentry、Snuba、Relay、任务服务、Consumer
    → 运行在 Docker

Envoy
    → 运行在宿主机,作为唯一入口
最终诊断顺序应固定为:
1. PostgreSQL 是否 online
2. PgBouncer 6432 是否可连接
3. Redis 是否 PONG
4. Kafka 是否监听 9092
5. ClickHouse 是否可查询
6. SeaweedFS Bucket 是否存在
7. Sentry Web 的 /_health/ 是否 200
8. Sentry Web 的 / 是否 302
9. Envoy 的 /_health/ 是否 200
10. Envoy 的 / 是否 302
11. 浏览器通过 :80 是否进入登录页
12. SDK 是否可成功发送测试事件
最终用户入口只有:
http://服务器IP/或后续的:
https://sentry.example.com/Sentry 半裸机部署故障修复补充:从 Relay 403 到事件正常入库
上一篇文章完成了 Debian 13 上的 Sentry 半裸机部署:
PostgreSQL / PgBouncer
Redis
Memcached
Kafka
ClickHouse
SeaweedFS
Envoy
其中基础设施运行在宿主机,Sentry、Relay、Snuba 等应用组件运行在 Docker,并统一使用:
network_mode: host部署完成后,Sentry Web 可以正常打开,Relay 也可以正常启动,但是从 SDK 发送的错误始终没有出现在 Issues 页面。
这次补充记录从故障现象、源码定位到最终修复的完整过程。
一、最终故障链路
最开始以为问题发生在 Relay:
SDK
  ↓
Envoy :80
  ↓
Relay :3000
  ↓
Sentry
实际上,完整链路是:
SDK
  ↓
Envoy
  ↓
Relay
  ↓
Kafka ingest-events
  ↓
events-consumer
  ↓
taskworker
  ↓
SeaweedFS nodestore
  ↓
Kafka events
  ↓
Snuba errors consumer
  ↓
ClickHouse errors_local
  ↓
Sentry Issues 页面
最终发现并不是一个问题,而是连续存在两个问题:
- Relay 没有被 Sentry 认定为内部 Relay,导致项目配置接口返回
403; - 修复 Relay 后,事件进入消费队列,但 taskworker 写入 SeaweedFS 时因 S3 签名错误失败。
只有两个问题都修复,事件才会最终显示在 Issues 页面。
二、第一阶段:Relay 获取项目配置返回 403
1. 初始日志
Relay 日志持续出现:
failed to fetch global config from upstream
upstream request returned error 403 Forbidden
can't fetch project states
Health check probe 'auth' failed
Sentry Web 日志对应显示:
Forbidden: /api/0/relays/projectconfigs/
status_code=403
具体请求是:
POST /api/0/relays/projectconfigs/?version=3这说明:
Relay 可以连接 Web
Web 也确实收到了请求
但 Web 拒绝了 Relay 的身份
因此当时可以排除:
Relay upstream 地址错误
Relay 容器无法连接 Web
Envoy 路由错误
Relay 凭据文件不存在
Relay 版本不匹配
2. 检查 Relay 数据库记录
通过 Sentry Django Shell 查询 Relay:
from django.apps import apps

Relay = apps.get_model("sentry", "Relay")

relay = Relay.objects.get(
    relay_id="Relay ID"
)

print({
    "relay_id": relay.relay_id,
    "public_key": relay.public_key,
    "first_seen": relay.first_seen,
    "last_seen": relay.last_seen,
    "is_internal": relay.is_internal,
})
当时的结果是:
relay_id: 匹配
public_key: 匹配
first_seen: None
last_seen: None
is_internal: False
Relay 凭据文件中的:
id
public_key
都和数据库记录匹配,凭据文件本身也能被 Relay 读取。
但:
first_seen = None
last_seen = None
说明 Relay 从未成功完成被 Sentry 接受的注册流程。
三、从 Sentry 26.7.2 源码定位 403 原因
最关键的源码位于:
sentry/api/endpoints/relay/project_configs.pyRelayProjectConfigsEndpoint 的核心代码是:
authentication_classes = (RelayAuthentication,)
permission_classes = (RelayPermission,)
真正返回 403 的判断是:
relay = request.relay

if not relay.is_internal:
    return Response(
        "Relay unauthorized for config information",
        status=403,
    )
这说明:
projectconfigs 接口只允许 internal Relay 获取全局配置和项目配置接着读取 Relay 注册代码:
sentry/api/endpoints/relay/register_response.py其中有:
is_internal = is_internal_relay(request, public_key)并且每次注册都会重新写入:
if relay.is_internal != is_internal:
    relay.is_internal = is_internal
    relay.save()
因此手动修改:
relay.is_internal = True
relay.save()
不是可靠修复。
Relay 下次重新注册后,Sentry 会再次计算:
is_internal_relay(...)如果判断结果仍然是 False,数据库就会被重新写回:
is_internal=False1. Sentry 判断内部 Relay 的三种方式
在:
sentry/api/authentication.py中,Sentry 26.7.2 的判断逻辑是:
def is_internal_relay(request, public_key):
    if settings.DEBUG:
        return True

    if public_key in settings.SENTRY_RELAY_WHITELIST_PK:
        return True

    if is_internal_ip(request) and options.get("relay.allow_internal_ip_auth"):
        return True

    return False
也就是说,Relay 必须满足以下任一条件:
方式一:开发模式
settings.DEBUG is True生产环境不应该使用。
方式二:公钥白名单
public_key in settings.SENTRY_RELAY_WHITELIST_PK方式三:内部 IP 认证
is_internal_ip(request)
and options.get("relay.allow_internal_ip_auth")
我们确认数据库选项:
relay.allow_internal_ip_auth=True但由于当前是:
network_mode: hostRelay 的请求来源没有被 Sentry 的 is_internal_ip() 逻辑识别为允许的内部地址。
所以最终表现为:
allow_internal_ip_auth=True
但 is_internal_relay() 仍然返回 False
四、第一项修复:加入 Relay 公钥白名单
当前部署只有一个本机 Relay,最稳定的做法是将该 Relay 的公钥加入 Sentry 白名单。
首先备份配置:
cp -a \
  /etc/sentry/sentry.conf.py \
  /etc/sentry/sentry.conf.py.bak.relay-whitelist.$(date +%F-%H%M%S)
读取 Relay 公钥:
jq -r .public_key /etc/sentry/relay/credentials.json然后在:
/etc/sentry/sentry.conf.py中加入:
SENTRY_RELAY_WHITELIST_PK = [
    "Relay 的 public_key"
]
实际操作时不要把公钥和 Secret 发到聊天记录中。
然后强制重建 Web 和 Relay:
cd /opt/self-hosted-26.7.2

docker compose \
  -f docker-compose.app.yml \
  up -d --force-recreate web relay
1. 验证 Relay 认证恢复
查询有效配置:
docker compose \
  -f docker-compose.app.yml \
  exec -T web \
  sentry shell -c '
from django.conf import settings

print(len(settings.SENTRY_RELAY_WHITELIST_PK))
print(settings.SENTRY_RELAY_WHITELIST_PK[0][:12] + "...")
'
查询 Relay 状态:
docker compose \
  -f docker-compose.app.yml \
  exec -T web \
  sentry shell -c '
from django.apps import apps

Relay = apps.get_model("sentry", "Relay")
RelayUsage = apps.get_model("sentry", "RelayUsage")

relay = Relay.objects.get(
    relay_id="Relay ID"
)

print({
    "is_internal": relay.is_internal,
})

print(list(
    RelayUsage.objects.filter(
        relay_id=relay.relay_id
    ).values(
        "version",
        "first_seen",
        "last_seen",
    )
))
'
修复后结果:
is_internal: True
version: 26.7.2
first_seen: 有值
last_seen: 持续更新
这说明 Relay 已经成功完成:
register/challenge
register/response
projectconfigs
此前的:
403 Forbidden
failed to fetch global config
Health check probe 'auth' failed
不再是当前阻塞点。
五、第二阶段:Relay 已恢复,但 Issues 仍然没有事件
修复 Relay 后,向正确的 Sentry Store API 发送事件:
curl -X POST \
  "http://127.0.0.1/api/1/store/?sentry_key=项目公钥" \
  -H "Content-Type: application/json" \
  --data-binary @event.json
返回:
HTTP/1.1 200 OK响应包含:
{
  "id": "事件 ID"
}
Envoy 的 Relay 上游计数也增加:
rq_success 增加
rq_total 增加
rq_error 没有增加
rq_timeout=0
说明:
Envoy → Relay → Kafka已经正常。
但是 ClickHouse 中:
SELECT count()
FROM errors_local;
仍然是:
0于是继续检查 Kafka 和消费者。
六、Kafka 消费链路定位
检查 Consumer Group:
/opt/confluent-7.6.6/bin/kafka-consumer-groups \
  --bootstrap-server 127.0.0.1:9092 \
  --group ingest-consumer \
  --describe
结果显示:
ingest-events:
CURRENT-OFFSET = LOG-END-OFFSET
LAG = 0
说明:
events-consumer 正常消费 ingest-events但是继续检查 events Topic:
/opt/confluent-7.6.6/bin/kafka-get-offsets \
  --bootstrap-server 127.0.0.1:9092 \
  --topic events
在问题尚未修复时:
events:0:0于是判断:
事件已经进入 ingest-events
events-consumer 也在工作
但保存事件的后续任务失败
七、真正的第二个根因:SeaweedFS S3 签名错误
查看 taskworker 日志:
docker logs \
  --since 30m \
  sentry-self-hosted-taskworker-1
发现关键错误:
botocore.exceptions.ClientError:
An error occurred (SignatureDoesNotMatch)
when calling the PutObject operation
完整含义是:
taskworker 无法把事件内容写入 nodestoreSentry 的错误事件不是只写 ClickHouse。事件原始内容还要写入 nodestore,后续任务需要从 nodestore 读取原始事件。
如果 nodestore 写入失败,就会导致:
事件无法完整保存
Issue 无法正常创建
1. 对比 Sentry 和 SeaweedFS 的凭据
Sentry 的 nodestore 配置原来是:
SENTRY_NODESTORE = "sentry_nodestore_s3.S3PassthroughDjangoNodeStorage"

SENTRY_NODESTORE_OPTIONS = {
    "compression": True,
    "endpoint_url": "http://127.0.0.1:8333",
    "bucket_path": "nodestore",
    "bucket_name": "nodestore",
    "region_name": "us-east-1",
    "aws_access_key_id": "sentry",
    "aws_secret_access_key": "sentry",
}
SeaweedFS systemd 服务实际使用的是:
Environment=AWS_ACCESS_KEY_ID=sentry
Environment=AWS_SECRET_ACCESS_KEY=SeaweedFS 实际 Secret
因此产生了差异:
访问密钥:
Sentry       = sentry
SeaweedFS    = sentry

Secret:
Sentry       = sentry
SeaweedFS    = 另一个 Secret
结果就是:
S3 SignatureDoesNotMatch八、第二项修复:同步 SeaweedFS 凭据
先备份配置:
cp -a \
  /etc/sentry/sentry.conf.py \
  /etc/sentry/sentry.conf.py.bak.s3.$(date +%F-%H%M%S)

cp -a \
  /etc/sentry/config.yml \
  /etc/sentry/config.yml.bak.s3.$(date +%F-%H%M%S)
读取 SeaweedFS 的实际 Secret:
systemctl show seaweedfs \
  --property=Environment \
  --value
不要把完整 Secret 输出到聊天或日志中。
将该 Secret 同步到以下两处:
1. /etc/sentry/sentry.conf.py
SENTRY_NODESTORE_OPTIONS = {
    "compression": True,
    "endpoint_url": "http://127.0.0.1:8333",
    "bucket_path": "nodestore",
    "bucket_name": "nodestore",
    "region_name": "us-east-1",
    "aws_access_key_id": "sentry",
    "aws_secret_access_key": "与SeaweedFS完全相同的Secret",
}
2. /etc/sentry/config.yml
filestore.profiles-backend: 's3'
filestore.profiles-options:
  access_key: "sentry"
  secret_key: "与SeaweedFS完全相同的Secret"
  bucket_name: "profiles"
  region_name: "us-east-1"
  endpoint_url: "http://127.0.0.1:8333"
  addressing_style: "path"
  signature_version: "s3v4"
3. 确认 bucket 存在
export AWS_ACCESS_KEY_ID=sentry
export AWS_SECRET_ACCESS_KEY='SeaweedFS实际Secret'
export AWS_DEFAULT_REGION=us-east-1

aws \
  --endpoint-url http://127.0.0.1:8333 \
  s3api head-bucket \
  --bucket nodestore
aws \
--endpoint-url http://127.0.0.1:8333 \
s3api head-bucket \
--bucket profiles本次检查结果:
nodestore exists
profiles exists
4. 重建读取 S3 配置的服务
配置修改后,重建:
cd /opt/self-hosted-26.7.2

docker compose \
  -f docker-compose.app.yml \
  up -d \
  --force-recreate \
  web \
  taskworker \
  taskscheduler \
  events-consumer \
  post-process-forwarder-errors
不能只重启 Web,因为实际写 nodestore 的是:
taskworker必须确保 taskworker 读取到新配置。
九、最终验证
重新发送测试事件:
EVENT_ID=$(cat /proc/sys/kernel/random/uuid | tr -d -)

cat >/tmp/sentry-test.json <<EOF
{
  "event_id": "$EVENT_ID",
  "message": "S3 signature repair verification",
  "level": "error",
  "platform": "python"
}
EOF

curl -X POST \
  "http://127.0.0.1/api/1/store/?sentry_key=项目公钥" \
  -H "Content-Type: application/json" \
  --data-binary @/tmp/sentry-test.json
响应:
{
  "id": "e764aa428bd24086af8ee733acd51294"
}
然后查询 ClickHouse:
clickhouse-client \
  --query "
    SELECT
      event_id,
      project_id,
      timestamp,
      message
    FROM default.errors_local
    WHERE event_id = 'e764aa428bd24086af8ee733acd51294'
    FORMAT TSVWithNames
  "
最终结果:
event_id                                  project_id  timestamp            message
e764aa42-8bd2-4086-af8e-e733acd51294      1           2026-08-17 17:14:57  S3 signature repair verification
这证明事件已经完成:
HTTP 接收
→ Relay
→ Kafka
→ events-consumer
→ taskworker
→ SeaweedFS nodestore
→ Snuba
→ ClickHouse
同时,之前的错误:
SignatureDoesNotMatch已不再出现。
十、最终状态
当前关键链路状态如下:
| 组件 | 状态 |
|---|---|
| Envoy | 正常转发 |
| Relay | 已成功认证 |
Relay is_internal | True |
Relay last_seen | 持续更新 |
| Relay → Kafka | 正常 |
events-consumer | 正常消费 |
taskworker | 已能写入 SeaweedFS |
SeaweedFS nodestore | 正常 |
SeaweedFS profiles | 正常 |
| Snuba errors consumer | 正常消费 |
ClickHouse errors_local | 已写入事件 |
| Sentry Issues | 新事件可正常生成 |
十一、仍然存在但不阻塞事件的日志
1. GeoIP 数据库缺失
日志:
Error opening GeoIP database:
/geoip/GeoLite2-City.mmdb
这只影响:
IP 地理位置
城市
国家
地区
不影响错误事件接收、存储和 Issues 创建。
如果以后需要 GeoIP,可以下载:
GeoLite2-City.mmdb放到:
/etc/sentry/geoip/GeoLite2-City.mmdb并确认容器挂载:
- /etc/sentry/geoip:/geoip:ro然后重建相关服务。
2. Redis 锁竞争警告
日志:
UnableToAcquireLock:
Could not set key
例如:
detect_escalation这是多个任务同时竞争同一个 Redis 锁产生的警告,不影响基础错误事件写入。
如果频繁出现,需要另行检查:
Redis 可用性
Redis 持久化
任务并发量
taskworker 数量
但它不是本次事件不显示的根因。
十二、这次故障的经验总结
1. HTTP 200 不代表 Issues 一定会出现
Store API 返回:
200 OK只能说明事件被入口接受,不能证明事件已经成功写入:
nodestore
ClickHouse
Sentry Issue
必须继续检查:
Kafka offset
Consumer lag
taskworker 日志
ClickHouse 数据
2. Relay 认证和事件入库是两个独立问题
第一阶段的问题:
Relay projectconfigs 403第二阶段的问题:
SeaweedFS SignatureDoesNotMatch两者表现都可能是:
SDK 发送后,Issues 没有数据但修复点完全不同。
3. S3 兼容服务的三项配置必须完全一致
Sentry 使用 SeaweedFS 时,至少要保证以下配置一致:
endpoint_url
access key
secret key
region
signature version
addressing style
本次核心差异是:
SeaweedFS Secret ≠ Sentry Secret即使:
endpoint 正确
bucket 存在
access key 正确
只要 Secret 不同,仍然会出现:
SignatureDoesNotMatch4. network_mode: host 会影响 Relay 内部身份判断
Host Network 的优点是:
应用层可以直接访问宿主机服务
配置简单
避免 Docker DNS 与宿主机服务混用
但它也会改变:
请求来源 IP
容器网络边界
Sentry 对 Relay 来源的内部 IP 判断
因此在半裸机部署中,建议为本机 Relay 配置明确的:
SENTRY_RELAY_WHITELIST_PK不要完全依赖:
relay.allow.internal.ip.auth因为实际来源 IP 是否被 Sentry 识别为 internal,还取决于:
Host Network
代理层
监听地址
请求路径
Sentry 内部 IP 判断规则
十三、最终排查顺序建议
以后遇到“SDK 发送成功但 Issues 没有事件”,建议严格按照以下顺序检查:
1. Store API HTTP 状态码
2. Envoy → Relay 请求计数
3. Relay 是否存在 403 / auth 错误
4. Kafka ingest-events 是否增长
5. ingest-consumer 是否有 lag
6. taskworker 是否出现异常
7. events Topic 是否增长
8. snuba-consumers 是否有 lag
9. ClickHouse errors_local 是否有数据
10. Web Issues API 是否能查询到事件
对应命令:
docker logs --since 10m sentry-self-hosted-relay-1/opt/confluent-7.6.6/bin/kafka-consumer-groups \
--bootstrap-server 127.0.0.1:9092 \
--group ingest-consumer \
--describedocker logs --since 10m sentry-self-hosted-taskworker-1/opt/confluent-7.6.6/bin/kafka-consumer-groups \
--bootstrap-server 127.0.0.1:9092 \
--group snuba-consumers \
--describeclickhouse-client \
--query "SELECT count() FROM default.errors_local"这次最终故障不是单纯的 Relay 问题,而是:
Relay 内部认证未配置
+
SeaweedFS S3 Secret 与 Sentry 不一致
两个问题修复后,Sentry 已能够从入口接收事件、经过 Kafka 和消费者处理,并最终在 ClickHouse 中查询到错误事件。